HowtoSetUpFree,UnlimitedProfessionalEmailsUsingCloudflare
Paying for Google Workspace or Zoho just to get a custom @yourdomain.com email adds up fast. In this guide, I share how to get unlimited custom emails for free using Cloudflare Email Routing and Gmail.
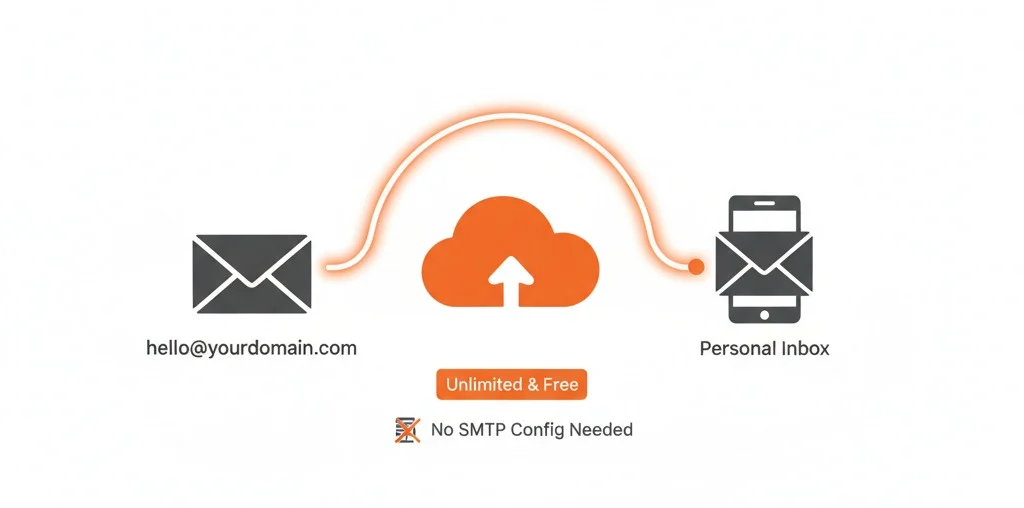
Hey everyone, Nasywan here. Between tweaking my Hyprland config on CachyOS and coding, I started thinking about a small detail that developers often overlook when showing off their portfolios.
Ever wondered why some outreach emails get ignored or freelance pitches fall flat? Sometimes it boils down to something super simple: using a generic free email address that looks amateur.
Put yourself in a client's or recruiter's shoes for a second. Which one looks more serious on a GitHub profile, resume, or portfolio site?
A. randomgamer123@gmail.com
B. work@yourdomain.com
Obviously option B. A custom domain email makes you look put together, professional, and memorable. It is one of the easiest personal branding wins you can grab with almost zero downside.
The problem is that the usual route means subscribing to paid email hosting like Google Workspace or Microsoft 365. That costs around six to eight bucks a month per inbox. For students or indie developers just starting out, monthly subscription fatigue hits quick, especially if you just want to receive messages from your portfolio contact form.
The good news is there is a neat trick to get this custom email setup completely FREE and UNLIMITED. We can use Cloudflare's edge network, and you won't even need to mess with complex server configs.
Here is a step-by-step breakdown of how it works.
The Core Concept: Forwarding vs Hosting
Before jumping into the setup, let's clarify how this is structured. Cloudflare Email Routing is not an email host with its own storage mailbox like Google Drive or iCloud.
It functions purely as an intelligent proxy forwarding layer.
The flow is straightforward:
- Someone sends an email to hello@yourdomain.com.
- The nearest Cloudflare edge server catches the message.
- Cloudflare runs a quick spam and security check, then instantly forwards the email to your personal Gmail account.
- The message lands right in your regular Gmail inbox.
Here is a quick look at how this compares to dedicated solutions:
| Feature | Google Workspace | Zoho Mail | Cloudflare Email Routing |
|---|---|---|---|
| Storage | 30 GB Dedicated | 5 GB Dedicated | Uses your personal Gmail quota (15 GB) |
| Monthly Cost | ~$6 to $7 / user | Free (with restrictions) | 100% Free |
| Email Aliases | Limited by plan | Max 5 aliases | Unlimited |
| Inbox Access | Dedicated web/mobile apps | Zoho webmail/app only | Your regular Gmail client |
| DNS Setup | Manual and slower propagation | Manual | One-click automatic |
With Cloudflare, you can create dozens of aliases like support@yourdomain.com, invoices@yourdomain.com, or even github@yourdomain.com to organize notifications, and every single one lands in your main Gmail inbox. Super clean, and no need to keep extra mail apps running in the background.
Step 1: Get a Domain
First off, you need to own a domain name. If you do not have one yet, check registrars like Namecheap, Cloudflare Registrar, Hostinger, Niagahoster, or DomaiNesia. Compare pricing and pick whatever fits your budget.
Quick tip: don't obsess over .com if you are on a tight budget or your preferred handle is already taken. Plenty of solid tech-friendly extensions exist:
.devor.io: Prestigious for developers and startups, but generally on the pricier side ($15 to $40+ per year)..techor.site: Budget-friendly alternatives often discounted for the first year..xyzor regional ccTLDs: Super affordable entry points if you just want something personal up and running.
Pick something short, clean, and without confusing random numbers.
Step 2: Point Your Nameservers to Cloudflare
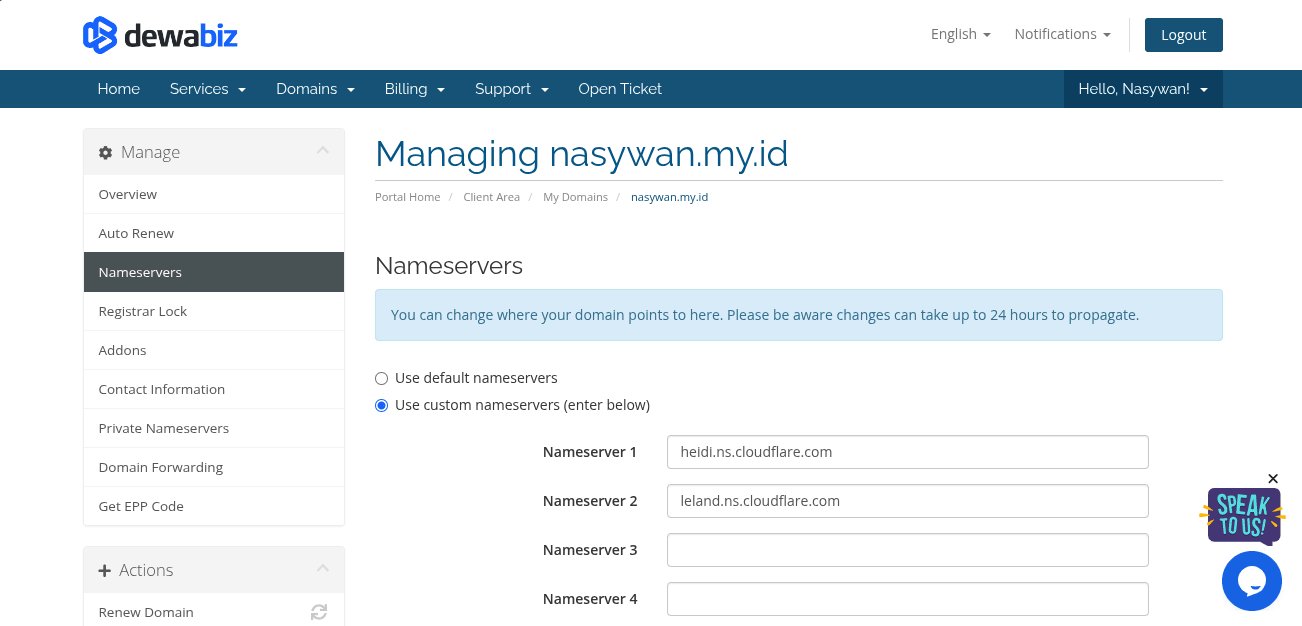
This is the glue for the setup. You need to tell your registrar that Cloudflare will manage your DNS records from here on out.
- Create a Cloudflare Account
Sign up for free at cloudflare.com. The Free plan covers everything we need. - Add Your Domain
In your Cloudflare dashboard, click "Add a Site" and type in your domain name. - Copy Your Assigned Nameservers
Cloudflare will scan your records and give you two nameservers, for example adam.ns.cloudflare.com and bella.ns.cloudflare.com. Copy them. - Update at Your Registrar
Head back to your domain registrar dashboard. Find the Nameserver management section, switch to "Custom Nameservers", and paste in the two Cloudflare nameservers.
DNS Propagation Note:
DNS updates take a little time to propagate worldwide. Sometimes it takes five minutes, other times an hour. Cloudflare will send an email confirmation once your domain is active.
Step 3: Enable Cloudflare Email Routing
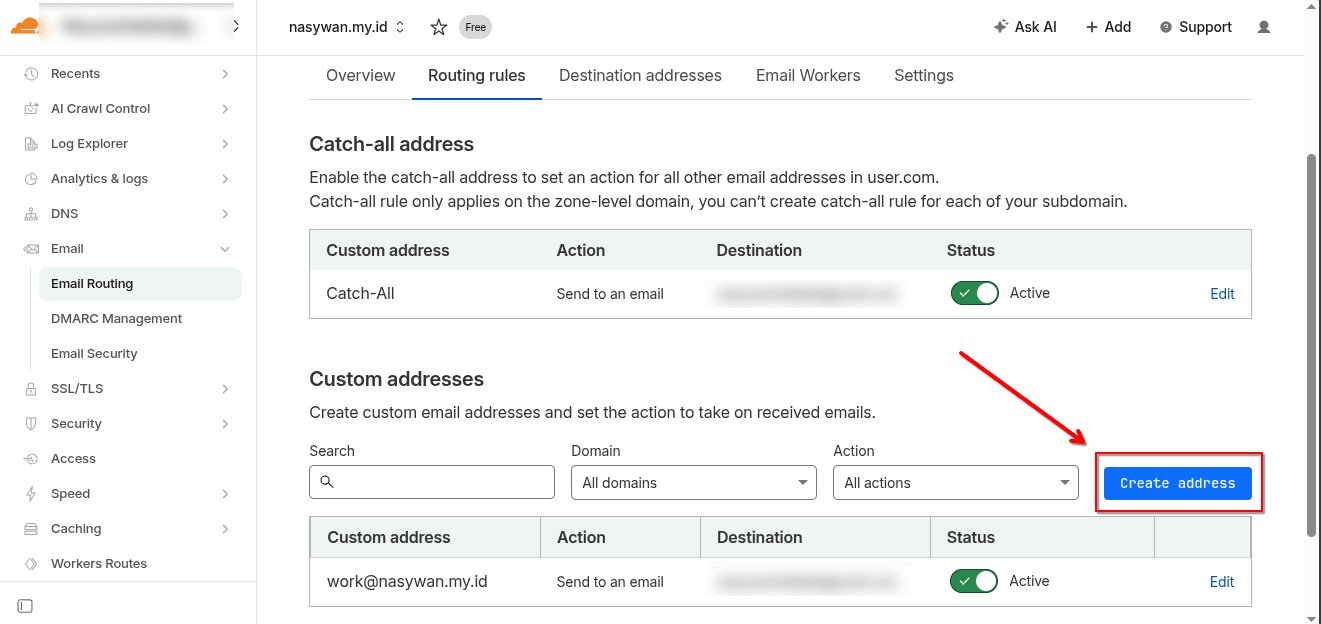
Once your domain shows an "Active" status in Cloudflare, we can configure the routing.
- Open your domain dashboard inside Cloudflare.
- In the left sidebar, click Email, then select Email Routing.
- Click "Get Started".
- Under Custom address, enter the email prefix you want (e.g., hello or contact).
- Under Destination address, type in your regular personal Gmail address.
- Cloudflare will send a verification email to your Gmail. Open it and click the confirmation link.
Once verified, click "Create Address". You can repeat this step to create as many aliases as you want. Incoming emails work immediately.
The Trick: Sending Emails From Your Custom Domain via Gmail
Receiving emails is only half the battle. What happens when a recruiter or client reaches out and you need to reply?
If you reply directly in Gmail, your sender address will display as yourrealname@gmail.com. To keep things professional and send as hello@yourdomain.com, we can hook up Google's free SMTP server inside Gmail itself.
Part A: Create a Google App Password
For security reasons, Google does not allow direct SMTP logins with your primary account password. We need a dedicated 16-character App Password.
- Go to your Google Account Security settings (myaccount.google.com/security).
- Make sure "2-Step Verification" is turned on.
- Search for App Passwords in the top search bar.
- Under the app dropdown, choose "Mail". Under the device dropdown, pick "Other" and type a reference name like "Cloudflare SMTP".
- Click "Generate".
- Google generates a 16-character code. Copy this password carefully, you won't be able to view it again.
Generating an App Password is the standard way to securely connect external tools to enterprise-level SMTP servers.
Part B: Configure SMTP in Gmail
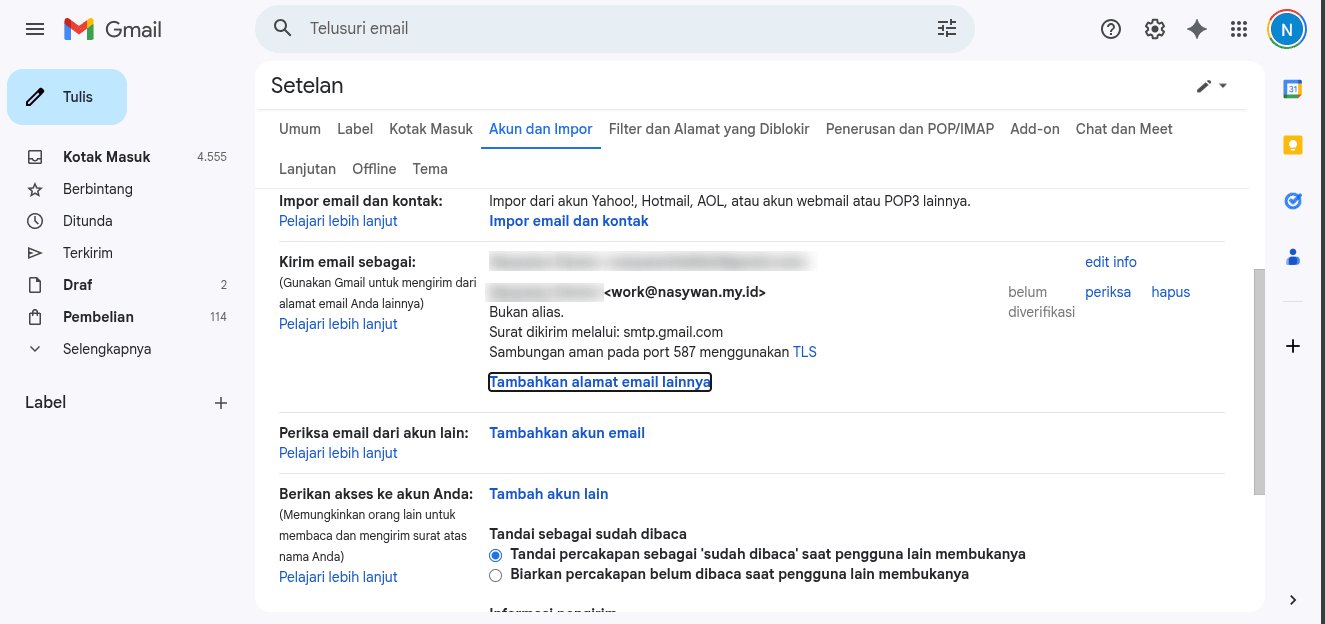
Now let's wire your custom address into Gmail's compose window.
- Open Gmail on your computer browser (not from your phone).
- Click the gear icon in the top right, then select "See all settings".
- Navigate to the "Accounts and Import" tab.
- Find the "Send mail as" section and click "Add another email address".
- In the popup window, type your display name and your custom domain address (e.g., hello@yourdomain.com).
- IMPORTANT: Make sure the "Treat as alias" checkbox is UNCHECKED. This keeps your sender identity completely separated. Click "Next Step".
Part C: Enter Google SMTP Credentials
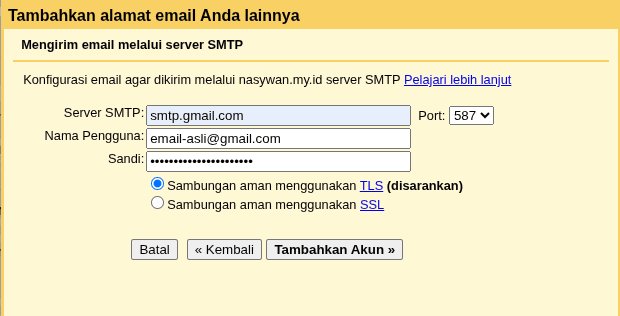
In the final dialog, enter these outbound gateway details:
- SMTP Server:
smtp.gmail.com - Port:
587 - Username: Your full personal Gmail address.
- Password: Paste the 16-character App Password you generated earlier.
- Choose the secured TLS connection option.
- Click "Add Account".
Gmail will send a confirmation code to your custom address. Since incoming mail routes directly back into your Gmail inbox thanks to Cloudflare, the verification code lands in your inbox within seconds. Enter that code into the popup.
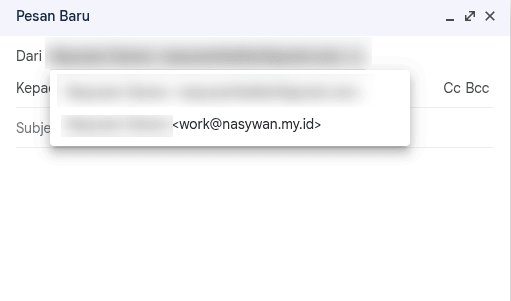
Now hit "Compose" in Gmail. Click the dropdown in the "From" field. You can now choose whether to send from your regular personal Gmail or from your custom domain address.
Wrapping Up
Taking thirty minutes to set up DNS records and configure SMTP saves you sixty to eighty dollars every single year. You get the same professional polish as a paid enterprise mailbox without spending a dime on email hosting.
If you are applying for internships, hunting for full-time jobs, or pitching international freelance clients, ditch the generic address and set this up. It is a quick upgrade that pays off immediately.
(Share)